Digital Deluxe Toolbox version 1.0 DOWNLOAD ![]()
This actionset for Adobe Photoshop 6.x is intended for use with digital photography, to aid and assist the photographer in achieving better images.
The set 'digital_deluxe' consists of the following Actions:
De-noise Deluxe 1.2
Mid-ISO grain (optional)
Hi-ISO grain (optional)
chromanoise
colour restore (optional)
EdgeMask
LuminosityMask
Underexposed
contrast masking
hi-pass sharpening
retrieve L channel
 |
 |
This new denoise action is primarily intended for refining low-iso (ISO 100) digital photographs. Effectively an 'ISO reducer'. It is also extremely useful when the intent is to create B/W photos from colour originals (channel mixing), and in rescuing compressed JPG files.
Because of the differences in camera models, and the continuos advance in technology, it is near impossible to create a fully automatic noise reduction algorithm that will fit all cameras. However, this was my intended goal. It is fair to say, though, that the noise elimination in this package is aimed toward traditional CCD based cameras, and won´t do as nicely on CMOS based images, such as from the D30/D60. The main test camera was a Nikon Coolpix 995, but other models has been tested as well, including Rob Galbraiths high ISO Nikon D1H and Kodak DCS images. The results are better than anything I´ve compared it with, including Quantum Mechanic Pro, and other commercial Photoshop actions.
What it does:
A qualified attempt is made to remove chromanoise and soften regular
noise without compromising image detail.
How it works:
A flattened work copy is made from the original document, masks are created, the chromanoise action runs, and complicated, yet discreet luminosity de-noising occurs. After the manipulation, the work copy is flattened, closed and copied into your original document as a new layer. - In other words, this action (as well as many of the other actions included) leaves your original document completely unaltered, with Histories, Channels and Layers intact! It even purges all used memory in the duplicate to free resources. Only difference is the new layer that has been de-noised. This makes it easy to compare before / after, and eases further manipulation.
The De-noise Deluxe 1.2 action utilizes no less than three masks to protect fine detail from alterations;
EdgeMask protects fine detail, in-focus areas
from changing altogether.
NoiseShield (included) protects larger fields of detail from the
more aggressive de-noising. It also helps avoid colour banding.
Finally, LuminosityMask protects detail in near-white
areas, that would otherwise have been lost.
 |
 |
These masks are created automatically from the source image composite channel. De-noise Deluxe then uses these Masks in different degrees to protect detail and focus on larger fields of colour or out-of focus areas, where the noise is most visible and annoying.
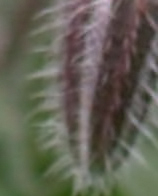
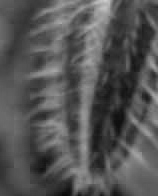
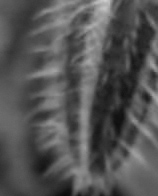
At first glance, the difference might seem very subtle, and this is by design. Everybody knows how critical detail and colour can be, and this is an action that takes these demands seriously. However, take a look at the Colour Channels, and you´ll notice a dramatic improvement.
 |
 |
Further de-noising is achievable by running subsequent ISO grain reducers (see below).
ISSUES: Although every step has been made to ensure minimal loss of detail & colour, because de-noising is essentially a destructive process, some detail are in the risk zone, and should be monitored: This specific kind of detail are areas of similar hue and lightness. For example fine waves on a lake, dense, far away foliage, or a distant flowerfield. Just something to be aware about. Remember, you can always use a Layer Mask to regain detail, if you feel there is a significant loss in the image (which should rarely happen, if ever). A moderate sharpening could also help bring out these lost details. But generally, you won´t find anything that is less destructive to detail while eliminating as much noise as this action. If you do, please notify me.
This action does not introduce sharpening. It is recommended to sharpen the image slightly after this action, try an USM setting of 50,1,1.
Tips:
- Asses the finished result from 100% or greater zoom, or by checking individual colour channels.
- Hit the Tab key on your keyboard to hide tools and palettes when running these actions. This will visually show you what is taking place as it goes.
- This action has been fully automated to allow for batching through File>Automate>Batch.
- Set up a shortcut key for the actions by double-clicking the action
in the Palette. I have my De-noise Deluxe set up on F11, and the Hi-ISO
grain action as Shift-F11.
Tips for reducing noise in general:
- Avoid high ISO speeds.. I almost always shoot with the lowest possible ISO value (duh!), but I developed these actions so I wouldn´t feel bad about the occasional indoor ISO 800 1/125s shot (CP995).
- Keep the camera cool: A heated camera creates much more noise than a cool camera (hence the name Coolpix?). For critical work, only turn on your camera when you take the shot, and leave ample margin between shots.
- Shoot RAW or TIFF in critical work = less noise.
- Don´t underexpose. Better to burn out that noise than to burn it in.
- If your camera allows, shoot with low or no in-camera sharpening, low contrast, low saturation. These steps are better done in Photoshop.
- Always use De-noise Deluxe on your images! (Store the original in a safe place though).
This action is an extra de-noiser you can run after the De-noise Deluxe action to further reduce luminosity grain in the image. This action is more aggressive than De-noise Deluxe, but utilizes some of the same techniques and masks. It does not remove additional chromanoise. Intended for mid-ISO photographs. The final result is merged with the De-noise Deluxe layer for convenience.
Tip: Pressing Ctrl-Z (undo) right after this action separates the mid-ISO denoise layer from the De-noise Deluxe layer for further editing.
 |
 |
This action is an extra de-noiser you can run after the De-noise Deluxe action to further reduce luminosity grain & harsh chromanoise in the image. This action is very aggressive, and makes some compromise with image detail. Runs an extra step of chromanoise removal. Intended for hi-ISO photographs, with severe grain and chroma noise. The final result is merged with the De-noise Deluxe layer for convenience.
Tip: Pressing Ctrl-Z (undo) right after this action separates the Hi-ISO denoise layer from the De-noise Deluxe layer for further editing.
A classical chromanoise action, this action attempts to eliminate chromanoise common in digital photography. Often, this action can bring out otherwise lost detail in saturated areas! OTOH, it can also introduce unwanted change to fine colour detail. See colour restore. Creates a work copy of the original, which is converted to Lab mode, and a+b channels are blurred, slight noise and saturation is added before closing and copying into the original as a separate layer. As most of these actions, it leaves the original document completely unaltered, save for a new layer. Part of De-noise Deluxe and Hi-ISO grain actions.
Tips:
- If you just want to remove colour noise, first run the EdgeMask action, do a Select>inverse, then run the Chromanoise action.
In some cases, due to its nature of blending colours, the chromanoise
action (included in De-noise Deluxe and Hi-ISO
grain actions), can create selective loss of saturation in fine colour
detail. This is far from always the case, but for some critical work (and
photographers) this Action can get back original colour. It is a simple,
yet very practical action: It creates a copy of the Background layer (where
your original image is expected to be), puts this new layer in Color Mode,
adds a Layer Mask, selects the mask, and automatically selects the Paintbrush
Tool and a white foreground color so you are all set to paint back color
detail directly in the image. Very, very easy, so I don´t want to
hear about any loss of colour!
Tips:
- Show / hide the De-noise Deluxe or chromanoise layer to see where the loss of colour occurs. (All layers but Background and colour restore are hidden by default - this will be fixed in the next version).
- If you´ve flattened the image after running chromanoise, you can still regain colour by using the History Brush, set to Color mode, setting the History State to Original image.
Creates a new alpha-channel from the composite RGB channel. Despeckle, Find Edges filter and a few curves and blur commands are run to create an all-situation reliable edgemask around fine detail in the image. Useful for many situations, like sharpening and de-noising.
Creates a new alpha-channel from the composite RGB channel, then identifies the lightest areas, and protects these from aggressive de-noising, thereby keeping detail in these delicate areas. (Production action for De-noise Deluxe, hardly useful on its own).
'Underexposed' uses a few of the included actions to normalize an underexposed or overexposed image automagically. It runs the De-noise Deluxe action and the contrast masking action in succession, to de-noise and correct exposure in one go. Finally, it applies a Curves command to increase visible dynamic range.
A small bug snook in on version 1.0: The ContrastMasking layer can´t be deleted (because it is called Contrast Masking in reality). Fix: Just trash the Contrast Masking layer manually if you wish.
'Contrast masking' evens out areas of underexposure and overexposure and is very well suited for bringing a subject out of the shadows for instance. It does so by creating a merged duplicate layer, desaturates, inverts, puts the image in Overlay Mode, and finally, custom heavy blurring are introduced. A little bit of magic.
A merged duplicate layer is created, put in Soft Light mode, and the Hi-pass filter runs with a custom value, followed by Despeckle (to avoid sharpening noise). The opacity and blend mode of the layer can be adjusted. I recommend Overlay or Soft Light blend modes. This is an alternative sharpening technique I learned from Bruce Fraser. Think of it as a Sharpen Adjustment Layer.
Creates a merged duplicate document, converts to Lab mode and retrieves the L channel and places it as an alpha channel in the original document. Very handy when you need that Luminosity Channel. I find I often do.
January 2002.
Page last updated august 11 2002.